Showing posts with label washi tape. Show all posts

Thursday, 10 March 2016

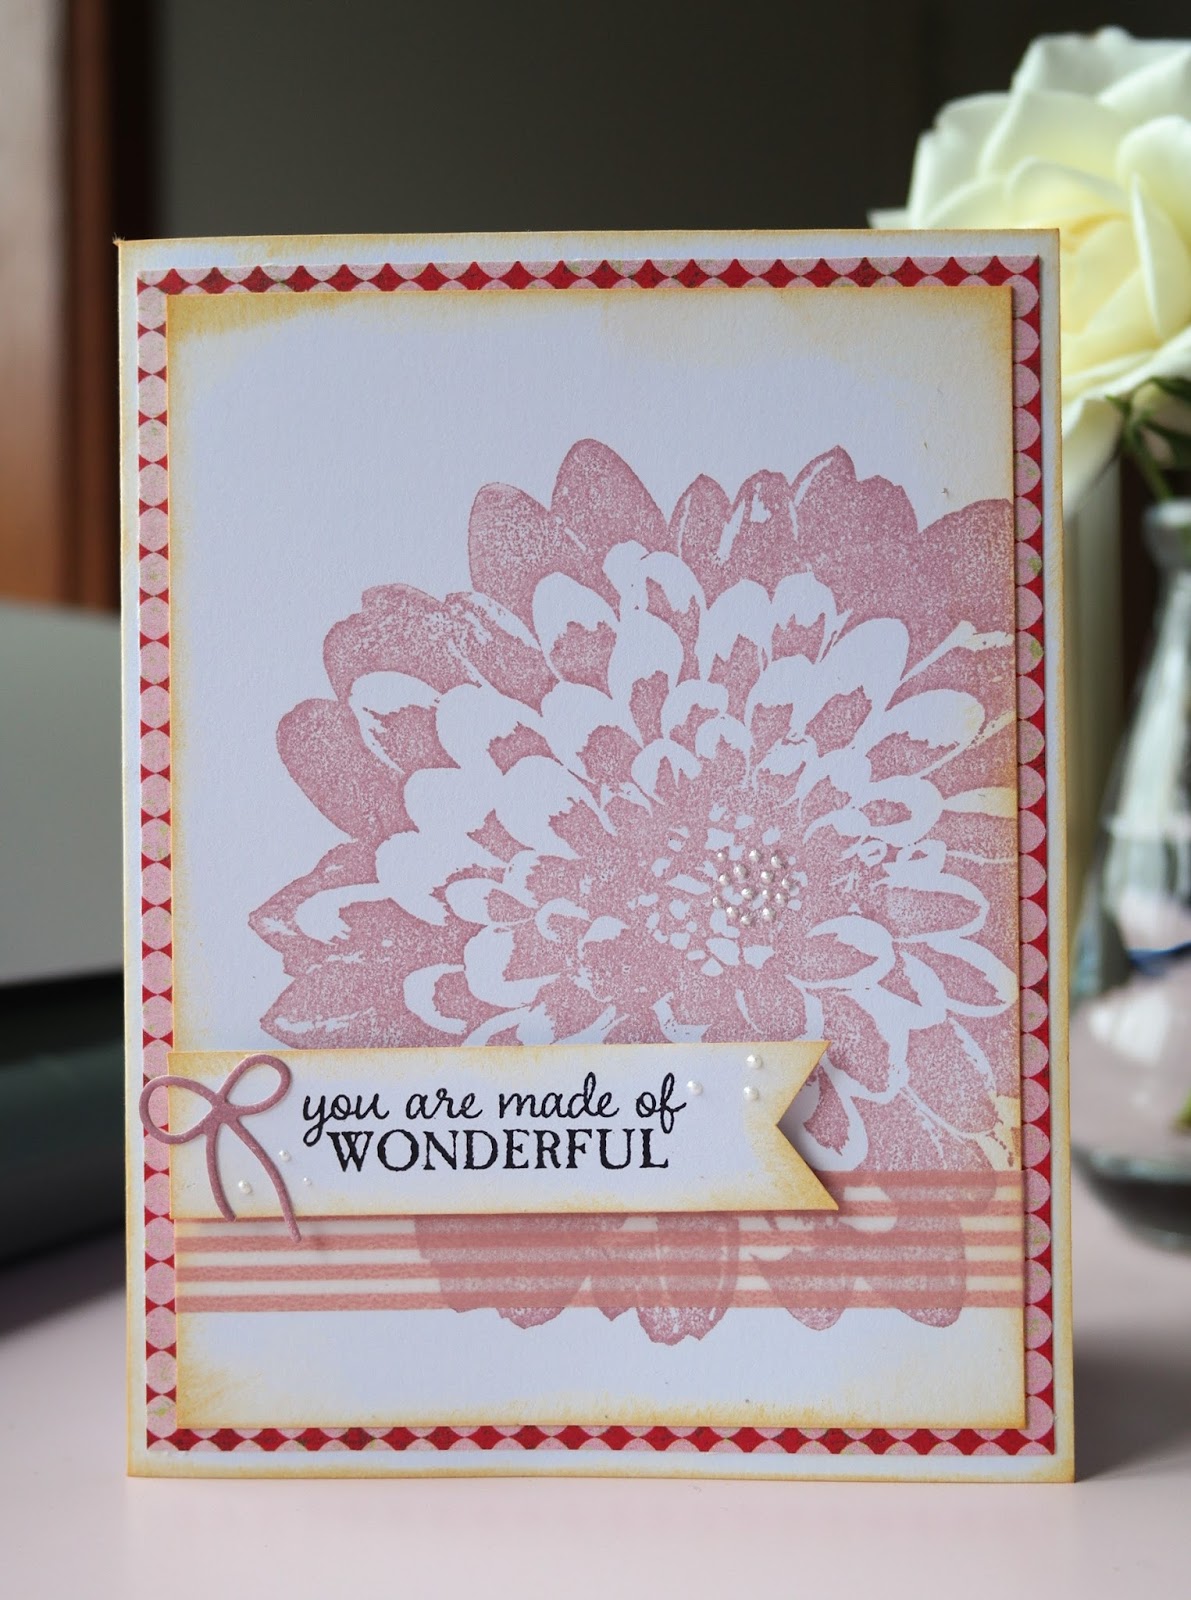
You Are Made of Wonderful - Definitely Dahlia

This morning started with exciting news - my first Stampin Up order has arrived at my doorstep!

So after going through all the routines, dropping off Ashley then my husband off at the osteotherapy place, I quickly drove home to open my parcel.  Stacks of catalogues, ordering forms, and the most important things - my new stamps!  Yes!!!  

I know I don't sound like an enthusiastic demonstrator but hey, this is my hobby and I've gotta enjoy it first, right?

Quickly I made myself a nespresso and sat down to make a card.  Bam!  Done!


I know that a Stampin Up demonstrator cannot advertise for competitor products so I'm not going to tell about other materials.  But the Dahlia and sentiment stamps are from Stampin' Up.  

background image: Definitely Dahlia
Sentiment: Picture Perfect stamp set


Ok time to have a lunch break and dig into other beautiful stamp sets.  

Sunday, 23 November 2014

Christmas Card: Rejoice!

Will I ever be sick of making Christmas cards?  Maybe, but not today.

After a while of trying to meet the deadline of the Christmas fayre by making several identical cards, I grow little bit tired of it.  I am just not a very commercial person, and even with the "identical cards I made, I try to change the colour, shape, or sentiments as I possibly can.

Because crafting to me is to creating different styles of me, to be unique and personal, as opposed to commercial, mass production, and cost down.  But don't get me wrong, I also love to be recognized and make a little profits along the way (who doesn't?)  It's just not to the point where I am forced to give up my own style.  Still I am trying to find it, and a lot of times doubting if it's actually good enough. (laughs)

Today I'm completely disorganized.  I let/make Peter take Ashley to school's 12 Days of Christmas (Dubai version) rehearsal and swimming lesson after, so I can just sit down on my craft room floor thinking what that I want my card booth table to look like.  I spend a good hour researching on Pinterest and stacking my boxes, mini wooden easels, trying to get that same ethereal, je n'ais sais quois feel of a lady's display table.  I give up eventually.

Fear is seeping through the walls and try to get me.  I came back to my true self, randomly picking up a 5 by 5 inch card base, using what's left on the table, which is pretty messy by the way, and just started stamping and assembling a card.  Then it is done.


Not the most complicated nor technical, but it is a lovely card.


Done for now.  I know I'll be tossing and turning, thinking about the props for the Christmas photo booth.  Oh why did I get myself into all this?!


Tuesday, 8 July 2014

Fusion Challenge: Hello (Summer! )

It's the Fusion Challenge again.  As always they offer two inspirations, one from the sketch and one from an actual photo with some elements waiting to be transformed.


I'm particular interested in the sketch on the right side, since first I never did it before and second, non-Americans can still join the challenge even though the title says Red White and Blue.  

And third, a sketch inspiration is always easier.  Why?  It's because not many people have many choices of patterns, stamps and ink colours to match the elements/colours in the photos, especially new cardmakers.   As a result,I always look to the layout and try to put together my limited materials. ( I also wonder why scrap-booking stuff in Dubai is so shocking expensively, (2-3X more than US) but I'll talk about it later.)

Anyway, my friend Stephanie came to do card-making last Sunday, and we both produced a couple of nice ones. This is mine.


It's sunny, breezy and happy. It says Hello, which is a rub-on I purchased last year while in Singapore.

I will post Stephanie's cards later.  She's not big on making cards but I forced her to make some with me and I'm telling ya, she's a natural. 


Wednesday, 7 May 2014

You Are Amazing! CAS Card with Chevron Washi Tape, Stamping and Liquid Pearls

So I haven't done any challenge for a month now.  I've been busy with my friend, Amanda's troublesome maid who stayed at my place for three weeks comfortably while Amanda was back in Japan to see her husband.  She brought me troubles while she was here, and worst of all, she took off after Amanda's back in Dubai, leaving her alone with her two kids.  But that was another story.

During the whole April I also signed up on a driving school, going to lectures and taking theory test, failing the road test, taking driving classes, failing test again, and taking more classes now.  More time and money wasted on a testing system that is totally confusing and there's nothing you can do unless you keep paying money.    So all in all this last month was not great.  But I did manage to survive, thanks to some great friends who give me support and love all the time.   

So Yesterday I made a card for a challenge.  It is the CAS-UAL Fridays Stamping Challenge


And here's my card. I use three major ingredients for the card: Chevron washi tape, Stamping, and liquid pearls.  (it looks a bit like a Christmas card with the pearls, though.)


This green/blue chevron pattern is my favourite washi tape. I line them up one by one and it's just clean and modern.


The dot on the flower was originally light blue. I put a liquid pearl later on just to add a bit of a small pop, just like the first photo.


See the silver finish on the wreath?  I haven't used perfect pearls for a while and this is just great to add some shine to the stamped image.  (I did use a silver pen to fill in the upper left side of the wreath but it didn't work very well.  Glad I stopped there and didn't go on) 


All in all, I'm still not feeling excited about this coming road test.  After hearing a lot of dark sides of the testing system I'm just not feeling hopeful at all.  But life has to move on. We'll see.


Monday, 4 November 2013

3 CAS Christmas cards in slightly different layouts


Over last weekend I managed to make some more Christmas cards to cope with the fact that I simple do not have time to make them in mid-November.  Reality is, I'll be travelling to Kuala Lumpur, Dubai and Australia in November and December, plus at the beginning of January we'll be moving to Dubai!  And I haven't started any packing yet!  And I'm still not freaking out. That is remarkable.


So here are the three cards I made - as always I do not put too many elements on the card to maintain a simple visual balance, and they are actually simple to make.  I also put two of these cards in the challenges.  These are my first ever challenges!  Oh and it's simply a joy just to view so many other beautiful cards listed there.


Tools used: Cuttlebug and embossing folder, Spellbinder dies, and Martha Steward doily punch


Distressed Style
Tools used: no special tools required except Croc-A-Dile to punch the little holes. I did distress the panel a bit to make it look a bit vintage but not too much.

I also put this card in Sparkle Creations' Christmas Card Challenge! 


I put the card on a photo frame so it shows the washi tape lining on both sides. And as usual you can see the lacking of my photo-shooting skill.


And there's still more card to make...  BTW I just got my first order from my friend, who needs a birthday card for her sister-in-law, and it has to be finished today. And off I go to make more cards - hey ho!


Sunday, 29 September 2013

Thank You Card (Washi tape rocks!)

My Fourth Thank You card for the International Voluteer Managers is done.  Super easy!


Method
1. Make card base
2. Use 3-4 washi tapes and affix on a white panel, leaving a line space at about 3/5 distance from top of the panel.
3. Stamp Thank You.  Adhere piece to card base.

Saturday, 28 September 2013

Thank You Card - For the International Volunteer Managers Day

Last week I met Renee Tan, a Singaporean mum whom I was chatting with when checking out at Made With Love, a popular and re-opened scrap-booking store in Singapore.  It makes me realize just how friendly (and chatty, HA!) scrap-booking people are in general.  Scrap-booking people are usually generous too, and so is Renee.  

During chatting she mentioned there's a Make a Card for the Needing group founded by her friend that I may be interested.  To be honest, I've heard of International Volunteering Day, but not International Volunteer Managers Day.  But this lady is someone Renee knows so should be ok. And with all the money spent on card-making it's really time to make some cards for a good cause.  So I said to myself to make four of the same Thank You cards and send to the founder.  

However, when starting making a second Thank You card I realize I don't really like making same cards. (Not good for business if I ever want to start one. But now it's still a vague idea so meh) So I went along and made 2nd and 3rd cards, of different designs.

First Card 


With the first card the only thing requiring a tool to make is the old typewriter, which I used the "sketch" function of Silhouette Cameo. It's really cool to see the machine work its pace and come up with a beautiful drawing, and then cuts it out flawlessly! I also used a glitter sketch pen so the drawing has really cool shimmer in the lines.


Second Card


With the second card, there was not any special tool needed to make, The only thing is the flower tag, which I made it myself using a Crop-a-Dile to punch smalls, and the flower washi tape from mt. (a Japanese washi tape manufacturer)  


Third Card


I'm happy with the layout of every one of them. But I'm particular fond of the third one simply because the tag tail is just too cute especially with the the twine tangles!  And that was an idea I thought would be fun to make, and it turned out great.


As my plan goes, I should be able to make the fourth one (in progress) within deadline.  Maybe I'll copy one of the previous designs to save time.  But anyways, Hip hip hooray!


Sunday, 8 September 2013

A pink and feminine card for a good friend

Living in Singapore for over two years, I found myself deeply in love with many things that are so uniquely of this particular dot on earth.  From tourist attractions and public facilities, eclectic alleys and lanes, rich food culture and respect of different races... to name a few.  I also made friends with some of the nicest people.  And as a friend I would love to make a card for each one of them.


1. Make white card from card stock.
2. Make two pink panels, one slightly lighter than the other one.
3. Emboss the light link panel with Cuttlebug. Adhere to the darker pink panel.
4. Trim and make a white panel same width as the pink panel. Punch scalloped border on one side. Affix washi tapes. Adhere white panel to the pink body. Adhere to card.
5. Punch and stamp chandelier. Adhere to card.

( Generally I like clean cards. I never like a card that's too complicated or overflowing with ribbons and 3D flowers.  So I didn't add any thing like pearls. But maybe someday I'll try)


Thursday, 5 September 2013

Best Wishes card, manly style

Every time I make a card or something, I always show it to Peter and he always replies"Ahhhh... very nice. " with a smile.  Whether or not if he truly like it I feel it's his support that makes my life as a housewife even more meaningful.  (Well he knows if he can have an opinion if he wants to have a bad evening haha!)

Well there you go, a simple manly Best Wishes card using some stamps and glue. 


1. Make card base from brown card stock
2. Make and trim a patterned strip, a white rectangle panel and a patterned panel and  from card stock. Lightly distress the white panel. Affix to card in order with the strip from top, white panel next and then the patterned panel.
3. Affix chevron washi tape on patterned panel.
4. Trim a white panel, stamp airplanes and trim the end into a swallow tail. Punch hole and affix the brad.  Affix panel to card.
5. Stamp Best Wishes on card.


Sunday, 1 September 2013

Father's Day card for Australian Father's Day

Yes, my husband is Aussie. And in Australia Father's Day always falls on the first Sunday of September.  Good thing about handmade cards for men is that they tend to be simple - less the feminine effects (flowers, embossing, frills and flourishes, etc) that is. Therefore, this is another simple card without any technical gadgets rather than just your scissors, trimmer and scoring board.


1. Make card base from cardstock. Blue/grey
2. Make a while panel smaller than the card base.
3. Affix washi tape lines across the panel.
4. Cut neck tie from scraps. Adhere to panel
5. Stamp Happy Father's Day sentiments
6. Adhere panel to card base.


Friday, 30 August 2013

THANK YOU card with washi tape / 用washi tape 做的感謝卡

Washi tapes are so hot now for good reasons.  They are versatile, easy to work with and create cool effects on any craft projects.  This Thank You card is one of them and is super easy to make.  No need to emboss, stamp or any tool to make it work (But yes you still need a trimmer and scoring board to make the job easier.)


Materials:
Card stock, twine, "Thank You in international languages"washi tape(MT brand).

1. Make white card base from cardstock
2. Make a patterened panel from card stock and adhere to card.
3. Make a wide red strip of card from cardstock. (I chose a pre-embossed red cardstock but you can use a non-embossed one)
4. position and stick Thank You washi tape on a piece of white strip, then adhere to the red strip. Adere to card
5. Wrap twine onto card and make a bow.


I love the high quality and design of MT tapes. They can be extremely handy in wrapping gifts as well.