Showing posts with label Papercrafting. Show all posts

Thursday, 22 May 2014

My Simple Botanical Tea Mini Album

Last week had been both a pretty good and bad week.  But I'm just going to highlight the good ones here.

Last Tuesday friends and I gathered together at Eliza's apartment for a lovely brunch, and we had such a great time catching up.  Besides eating yummy home food and chatting, everyone's got something for someone.    My appleTV box that Joanne bought for me via Groupon, and my Cinch (woot!) that Eliza's husband got for me whilst he was in USA, the stamp I borrowed a while ago to return to Ally, the fun Korean label maker thing Joanne got for everyone (cept me cos I got one already) which was ordered and delivered all the way from Taiwan, my stamping tools and ink pads Joanne has to return to me and so on.  It was such a joyous occasion which pretty much pushed away all the bad driving test results that caused my depression in May.

So for the rest of the week, I decided to stick with the happy thoughts and continue with my mini album challenge with Graphic 45, and finished it yesterday.  I want to give this to Eliza as a token for bring me back the WRMK Cinch binder all the way from USA.  I hope she likes it.


This is my third mini album, and I must admit it's not as professional as some of the others made with G45 paper.  But as a novice crafter I'm happy with the result.


When I first started it I just took an inspiration from Pinterest showing how to make a simple mini album without binding rings (the Cinch was not here yet!)  Also I didn't want to make a lot of layers or embellishments which might make the album look too bulky.  Therefore, there's mostly distressing and stamping and not so much pockets or labels.  But still the velcro tab still doesn't close completely. I'm a little bit worry when the photos are added would it still close properly.  We'll see.

front cover


front and back cover
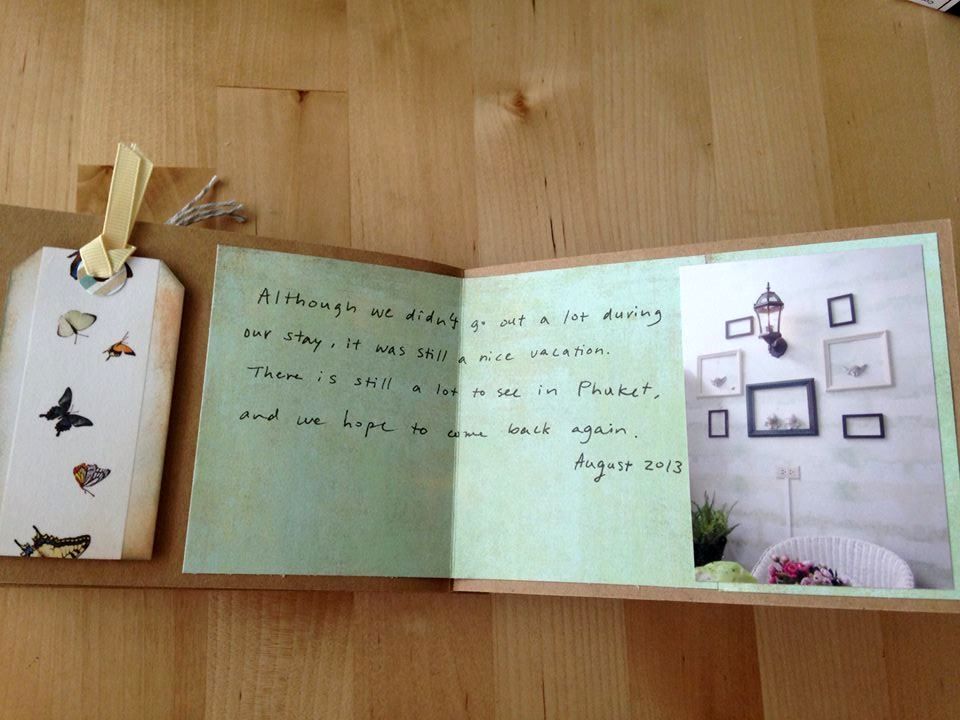


Inside pages


The Graphic 45 papers are so beautiful and well designed. Had a great time working with them too.

Thursday, 13 March 2014

Paper Craft - 3D Layered Rose

Two days ago it occurred to me that I haven't used Silhouette for a while, so I logged on to see the new designs.  I saw these wonderful 3D flower designs by Jame Lane, and just couldn't resist downloading some of them to try.


When my Cameo was cutting the petals out I was dubious and thinking that they didn't really look that impressive.

But as I was following the instructions on this page I was more convinced.
And what beautiful results they turned out!!


And they are as big as 10 cm in diameter!  Perfect for scrapbooking projects. :-)


Tuesday, 24 September 2013

A Cute Teabag Paper Purse

My friend Nathalie (Website: http://nathouest.canalblog.com/) always has many brilliant craft ideas, and she doesn't hold them to herself at all. Last Wednesday when we got together she gave me this beautiful paper-made teabag purse as a gift, and it's filled with orange spiced teabags! After showing me how to make it and the tips to make it right at first attempt, I straight away made a cute one for myself.  Ta-da!

PS:I later found out the original idea is from Splitcoaststampers.com   Thanks for the inspiration!


 Isn't it cute?  You can put 5-6 teabags in one purse et voila la you have a great Teacher's Day gift!

 Method:  http://www.splitcoaststampers.com/gallery/photo/1246242


(I accidentally punched a hole thinking I could use the brad in stead of velcro to clip the bag, but it didn't work and was on the wrong spot.  So I had to put a little flower brad to cover the hole.  Awkward.)

Tuesday, 3 September 2013

Mini Album - Family Trip to Phuket


It was a sunny day, a great day for a trip to Phuket, Thailand.  Couldn't be better.  Until it was when we were just about to leave home... and suddenly Peter had trip on the stairs!   Next thing I saw he was lying down on the floor, howling from the tremendous ache.  I was terrified. Ashley was terrified too, and started to cry.

For the next thirty minutes I was trying to make him feel better (marginally) by placing ice pads under him, checking and making sure his spine was ok.  Ashley was trying to calm his father too by readying a Princess book (too cute but not helping either)  The taxi's here and I had to tell him to wait another 20 minutes.  In the end Peter managed to drag himself to the taxi, while the driver and myself got the luggage cases in.  I almost thought we couldn't make it until we took off, landed, and checked in at the hotel.

For the entire vacation, not surprisingly, we were mostly in the hotel resort.  I was only grateful my Peter could at least ease his pain in water most of the time.  Seriously he could well be in hospital.
Surely we didn't do much, not any of the tourist thing except one afternoon in the Phuket Town.  But I'm happy we all had some rest and nice food.

Fortunately, after the trip and seeing the doc and taking X-ray, Peter was told he probably had a small fracture but is self-healing without a surgery.  We are truly grateful it wasn't anything too serious.

My first real mini album with photos.


It's not a well-planned design in terms of colour, styles and theme but I'm happy to have finished it.
Pad on my shoulder.


Friday, 30 August 2013

THANK YOU card with washi tape / 用washi tape 做的感謝卡

Washi tapes are so hot now for good reasons.  They are versatile, easy to work with and create cool effects on any craft projects.  This Thank You card is one of them and is super easy to make.  No need to emboss, stamp or any tool to make it work (But yes you still need a trimmer and scoring board to make the job easier.)


Materials:
Card stock, twine, "Thank You in international languages"washi tape(MT brand).

1. Make white card base from cardstock
2. Make a patterened panel from card stock and adhere to card.
3. Make a wide red strip of card from cardstock. (I chose a pre-embossed red cardstock but you can use a non-embossed one)
4. position and stick Thank You washi tape on a piece of white strip, then adhere to the red strip. Adere to card
5. Wrap twine onto card and make a bow.


I love the high quality and design of MT tapes. They can be extremely handy in wrapping gifts as well.


Thursday, 29 August 2013

A masculine HAPPY BIRTHDAY card. Easy!

Here's another card I made on my paper-crafting Wednesday.  A manly Happy Birthday card.

Strange thing I find some of us scrappers like to put cute or feminine elements on the cards for men.  But really, doesn't matter how lovely we think they are, seriously, men DON"T like those cutesy things.  Nothing cute or feminine, please.  Men do not like to receive cards with polka dots, butterflies, flowers or buttons. If they like them, they're lying.


(Chervron is a bit borderline cute I recon.)


1. Make 5.5" by 5.5" dark espresso card from cardstocck
2. Cut six 1.5" by 1.5" squares (or use a square punch) from scrap paper, or white ones taped with washi tapes.
3. Find a middle point in upper area and line a square in the center first. Then align with two other squres. Same method to line the second row of squares.
4. position Happy Birthday alphabet stickers on card base.


'Hello, Friend' card

I love paper crafting with my French friend, Nathalie Durand (http://nathouest.canalblog.com/).  We do lots of stamping, distressing, making cards and mini-albums, babbling about daily things and living in Singapore.  One thing worth mentioning is that this lady is always so efficient in making cards.  She can make six cards out from scratch whereas I can barely finish two within two hours.  Yesterday, however, I made three cards, which had never happened before.  I guess not over-thinking or overrunning your mind flow is very important.  In other words, focus, focus, focus.

And one of the cards I made. It's a bit cute but not over the top.  Quite simple actually.


1. Make white card base
2. Make a shiny pink panel that is slightly smaller than the card base. Leave it and don't adhere to card base yet.

3. Make a white rectangle panel a bit smaller than the pink panel. Emboss it with Cuttlebug. Adhere it to the pink panel. Then adhere the to card base. 
4. Stamp bottle, Hello Friend and heart on a piece of white paper. Trim around the shape of the bottle. 
5. Find a cute patterned paper from cardstock and trim it.  Adhere to card. Adhere the bottle to card with foam tape.


Tools used:

Paper Trimmer, Scoring board, scissors, adheresive (glue or glue tape), Cuttlebug embossing machine and embossing folder, acrylic block (for stamping), foam tape.


Friday, 7 June 2013

My first handmade mini album!

After two years abandoning my blog, I finally decided to come back and pick it up again.  But of course it's because I have new addiction now - card-making and crafting.  Pretty different from my old hobby (gaming)  but I figure my new love is definitely note-worthy.  So here it is.

Thanks to my Silhouette Cameo I've downloaded many great shapes and sketches, and so far had great fun crafting with them.  And this one is no different. It's a mini album I made with the design by Lori Whitlock.  Lori Whitlock has many beautiful designs, but I'm mostly fascinated by how simple they actually are, and if without someone actually putting the thoughts into the design and making it work, I wouldn't have thought about making it my whole life.

Ta-da!  And here it is, my very first handmade "mini" album (5.75 by 7.5 inches, not that small really)-


I'm so happy with the result even though I spent at least two hours making it, nearly missed my lunch and nap! (Yes it sounds like an excuse but I do need a nap every afternoon as a result of low blood pressure. And if I miss it I will get a serious headache and be very grumpy. And no one likes a grumpy housewife especially when it's nearly dinner time.)

To be honest, it isn't really easy to understand Lori Whitlock's video because she actually skipped the second most important part - the assembly of the binder/holder.  But since she mentioned that there are five sections to user the brads to secure, I managed to figure out by myself.  All in all it's not difficult and I tweaked a little bit by adding a little stamped frame (layered), the borders and a little arrow.

For those of you who haven't got the design, it has two files to download.  However, I'd suggest that you only need to down load the first file (File 1) , as it is the main structure of the album - the binder and the cover.  File 2 is just the inserts that you can put in the binder.


A close look at the binder -