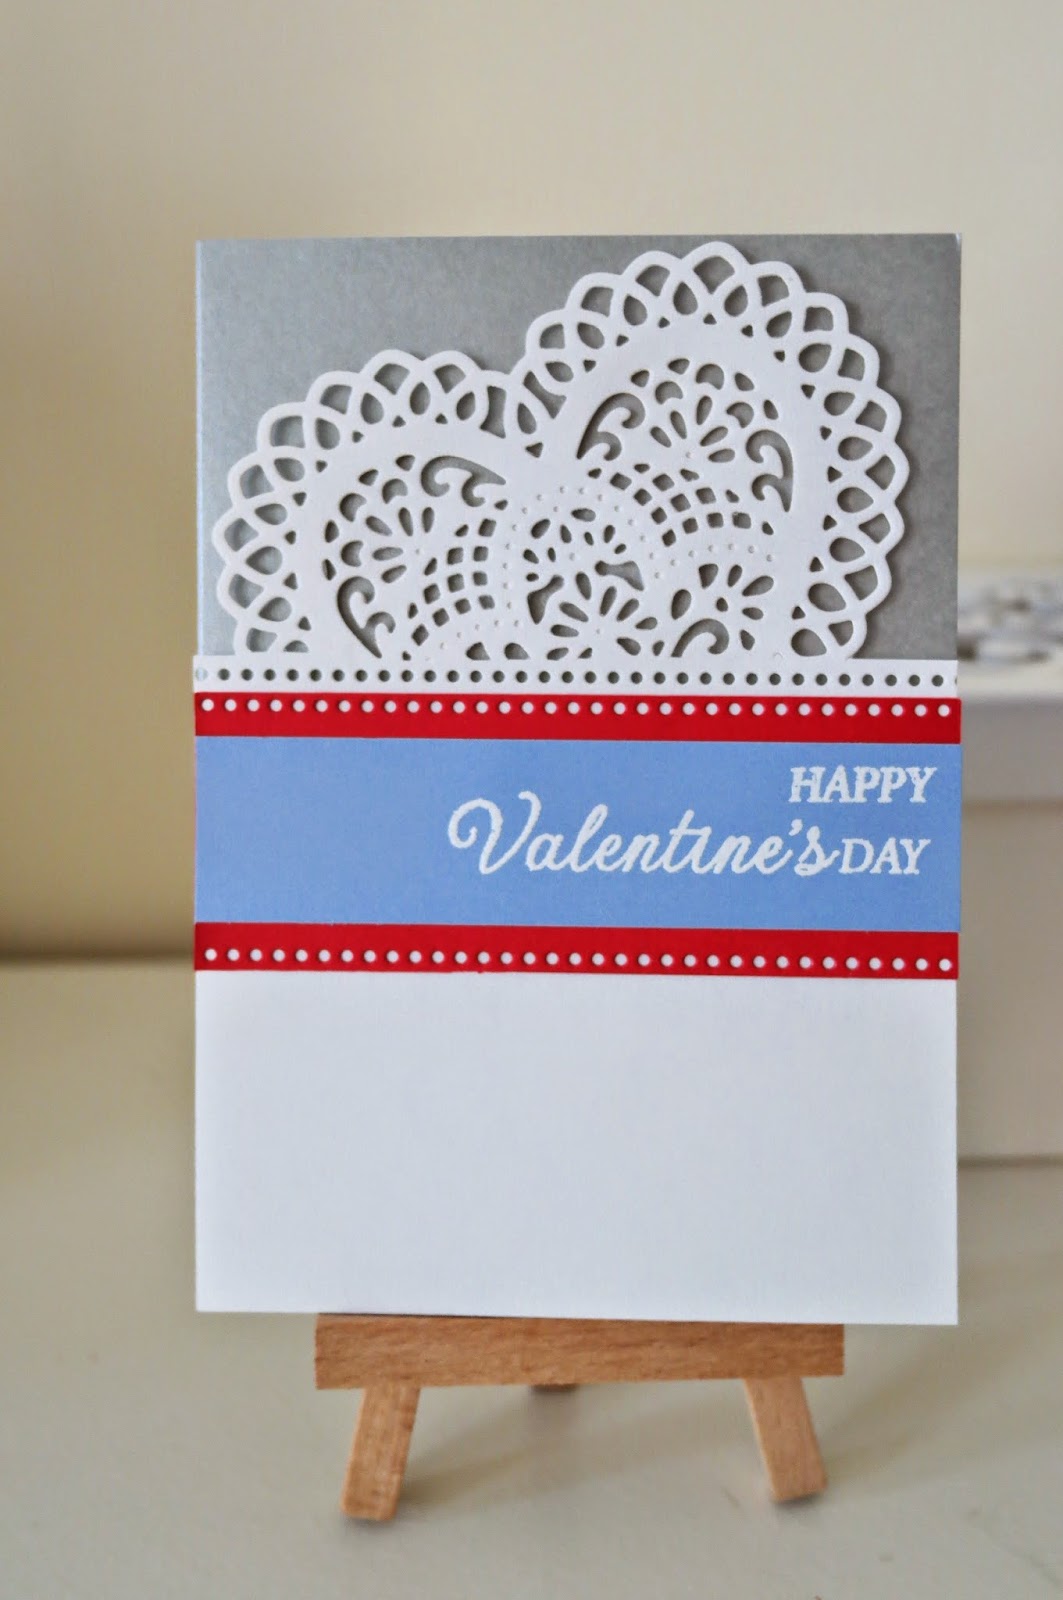
Showing posts with label Card. Show all posts

Sunday, 8 January 2017

Happy 40th Anniversary!

Last Sunday was a beautiful day. Not only did I still have a week to go before going back to work, but it was my cousin-in-law Carole's 40th wedding anniversary with her husband Peter.

 Carole and Peter have always been known over the years for their ability to make friends with people from all over the world, their excessive travels, great home cooked foods, and their generosity and humour. When my Peter and I were in Singapore Carole and Peter were living their expat lives there too and so we spent great time together through numerous lunches and dinners. We ate so many chili crabs that all our cholesterol levels hit all time high.

 So I thought I must make a nice card when we were invited to Carole and her husband Peter's home up in Kalorama for the 40th anniversary celebration of their 40th wedding anniversary. The Floral Boutique DSP and the Floral Phrases stamp set were the first thing that came in mind when I was thinking the style to make anniversary cards. And with the DSP it just came naturally easy.


It is rather easy to make with the simple lay out.  And I think I finished it within 40 minutes including searching for inspiration on Pinterest.


I also use numbers stamps and dies to create the numbers.  This card has a mono tone kind of feel, but it's still soft and feminine thanks to the detailed designs of the floral stamps.


Monday, 21 March 2016

Happy Easter (2) - Soft and pretty

Days have gone by so quickly and 5 days have past since I made this card.  Couldn't find time to upload it on my blog over the weekend (usually my busiest days of the week).  I did manage to post it on Facebook, but thought I better put it on my blog before anyone steals it and post it on theirs!  (Yeah like seriously we crafter ALL think our cards are really good! LOL)


Back to the topic.  I made this card for my mother in-law and posted it with two photos of Ashley last week.  I know she always like floral themes so thought this would be her cup of tea.

This card, along with my recent others, have been incorporated with both Stampin' Up elements as well as other brands.  Since I've become a demonstrator now, I will only disclose Stampin' Up materials used here - 

1. Paper - Designer Series Paper Specialty - Gold Soire
2. "Happy" and banner die - Stampin' Up


The 'Easter' seems a little unnoticeable and I think it would have look better using a different colour (green for example)  However, since I spent an hour making this card I didn't want to spend any more time fixing it! 

And still I have yet to find the best way to make my watermark and therefore didn't put it on the picture.  I wish I have a proper photo editing software to make one.  


Wednesday, 9 March 2016

Easter card 2016

The other day at the Stampin' Up class, someone asked Kate, "Do people send out Easter cards?"   Apparently Easter, although somewhat a big enough event on the calendar, is a less popular theme in the cardmaking world.  Perhaps it's the stronger religious indication underlying the day that pushes non-Christian people away from making the cards, I think.  To be honest even though I have an Easter die and stamps, I haven't made any yet.

But think about all the pastel colours, the colourful eggs, the cute bunny and chicks!  I have to make an Easter card.  It has to have lovely pink, blue or green, and have to have a cute little animals in the middle, and maybe some eggs and flowers for decoration...


And so I did made one.  But what do people say about the project with the end result always different from what was originally planned?


It's simple.  That is all I can say.  Took me flipping one hour.


  Ok, I'm done with Easter card. Next.


Sunday, 4 January 2015

I Love, Love, Love You - Valentine's Card

Yet another card that didn't make it to the challenge.


I saw Paper Smooches had its challenge based on a sketch and thought I could practice with, and so made a card trying to beat the deadline.  Then one thing led to another I was busy cooking and forgot about uploading it.  Therefore I missed the deadline, again.

Still I am happy with the result.

Clean and simple.

I used Paper Smooches stitched dies eventually to meet the criteria too. 


Xx

Saturday, 3 January 2015

Happy Valentines Day Card

First of all, Happy 2015!

The Christmas holidays always ended too soon.  Overflowing with food, chocolate, drinks, the atmosphere and love from Adelaide, Australia, we carried our big bellies and warm hearts on the 13-hour haul of flight back to Dubai.  

Back home there is apparently many things in the list.  Mum's birthday card is the first in mind, and yet I just can't come up with a satisfying result.  So that's yet to be fulfilled and I have only a week to do so before mailing it out, which takes about 3-4 weeks to arrive in Adelaide.   

Meanwhile I have to relax.  I saw this Jennifer Mcquire's youtube on making the most of cutting dies and made a Happy Valentine's Card yesterday afternoon. Something done at least.  


I use Spellbindes heart dies as well as Paper Smooches stitches dies, as well as heat embossed sentiments to complete the card.  Since I still can't find an easier way to put the water mark on my photo I'll just skip it this time.    Xx


Thursday, 18 September 2014

Birthday Butterfly Card Part Two

As most card makers do, I constantly get praises for making lovely cards, as well as comments that I should really start a card-selling business of my own.   For the past year I have been commissioned to make a few cards, but they were made unique and took too much time with design and execution.  And because I don't need to work or make income for my family, and therefore I find it's just not worth of my time.  I keep do it simply because I love making cards.

However, my daughter's new school term gives me a second thought.  The school's gonna hold a Christmas fayre, and one of the mum talked to me (she makes fashion accessories) and said we should rent a stall together.  Well now I thought I might be able to make it - if I can make enough crafts for sale in time.  

So below are the very first batch of several similar Birthday cards, followed by this particular Birthday card I made previously for Ashley's classmate.


Aren't they cute?  I'm happy with them too.  

Note that for the first time I've put on my first watermark in this picture for copyright concerns. All my works are original and please do not copy them.  


Next I should really start making Christmas cards.  Time to look for some inspirations and get started. 

Saturday, 6 September 2014

Birthday Butterflies Card for Little Girls

Ever since Ashley starts school there're so many parties and events to go. And although preparing gifts is always a bit of a headache I do enjoy making cute and fun cards suitable for the age.

For example, I saw an inspiration from Pinterest and found a lovely butterfly card with four different colours of butterflies, and decided to make one that's similar.

https://www.etsy.com/listing/96921989/birthday-card-happy-birthday-kids


And here's my take on the sketch.


I'm very happy with it and think I might produce more.  Lovely!


Thursday, 10 July 2014

Stephanie's Second card challenge - CAS-ual Friday!

(I didn't want to put two challenges in one post, considering Steph made two different cards for two different challenges.)


This is another post for Steph's second card during our Sunday crafting session. It is for CAS-ual Friday Challenge

CFC133


CFC133: Create a Clean And Simple project that uses hearts in summer colors.
While we are featuring lots of CAS-ual Fridays Stamps products, you can use any products from your stash, and enter before noon on July 18th.
*the use of CFS products is not required to play or win*


And here's her work. :-)


PS: Because I'm more of a stamper than Steph is, we use my stamps and ink pads to do all the card-making.  And therefore in my next post I'll be showing the same mason jars images on my card too.  :-)


Monday, 2 June 2014

Handmade - Vintage Sweetness

So this time, I have been looking for the elements which are as close as what the challenge wants, and I manage to get them! (except the cutlery stamps I have aren't in a set and they look odd together.)   It also means I start to look a little bit like one of those big scrap-booking spenders hehe.


And yes I finally made it to the deadline!  And here's my card for the Fusion Card Challenge:


My card below:


Up front.  The black background with glossy polka dots doesn't look very good in picture, but is really cool in the Kaisercraft paperpad! 


From this angle you can really see the glossy polka dots on the black background. I love these paper with special features, but unfortunately you can't always see it through the pictures.   


I love the teapot image.  It's actually a sticker which I found in a local bookstore in Taiwan.  Very cute. 


Friday, 9 May 2014

Be You. Retro-Style Card Made with Rub-ons

Three weeks ago I saw on Fusion challenge that they had a new competition.  I didn't start doing it until just now, and when I'm done I found the link access is closed.  :-(

Fusion Card Challenge Chervons, Colours & a Reminder!!


But anyway, still happy to make this card for the challenge. Slightly a different style than I normally do and good fun.

Oh and got a tipoff from a fellow card-maker. She says I can enter for this Challenge too!

UnstampaBelles - http://unstampabelleschallenges.blogspot.ae/2014/05/may-challenge35-first-posting.html


When I made this card, I was actually thinking of my niece, Jessie, in Taiwan.

She's a brilliant, beautiful and independent high school girl, living with her busy-working mother and she looks after herself no problem.  But looking back when my oldest brother had a divorce with Jessie's mother 8 years ago, I was heartbroken with her situation.  She was only 10 years old back then, when everything was turned up-side-down.  Although all these years I wasn't around to be on her side, as she always knows and says, she still has love from everyone in the family and also from her father and mother.   I wish her a brilliant future being who she is and go for it all.

And this is for you, Jessie, my dearest niece.

Basically just simple cut-out and paste.  I use foam tape for the BE YOU sentiment just to make it pop.  The leaves an diamonds are rub-ons, plus some sparkles on top.


Bit Close-up.  


I love the patterned paper. It has a clear coating on top, a little bit like how you apply clear embossing powders.  This paper is from DCWV, Vintage Collector.  


Wednesday, 7 May 2014

You Are Amazing! CAS Card with Chevron Washi Tape, Stamping and Liquid Pearls

So I haven't done any challenge for a month now.  I've been busy with my friend, Amanda's troublesome maid who stayed at my place for three weeks comfortably while Amanda was back in Japan to see her husband.  She brought me troubles while she was here, and worst of all, she took off after Amanda's back in Dubai, leaving her alone with her two kids.  But that was another story.

During the whole April I also signed up on a driving school, going to lectures and taking theory test, failing the road test, taking driving classes, failing test again, and taking more classes now.  More time and money wasted on a testing system that is totally confusing and there's nothing you can do unless you keep paying money.    So all in all this last month was not great.  But I did manage to survive, thanks to some great friends who give me support and love all the time.   

So Yesterday I made a card for a challenge.  It is the CAS-UAL Fridays Stamping Challenge


And here's my card. I use three major ingredients for the card: Chevron washi tape, Stamping, and liquid pearls.  (it looks a bit like a Christmas card with the pearls, though.)


This green/blue chevron pattern is my favourite washi tape. I line them up one by one and it's just clean and modern.


The dot on the flower was originally light blue. I put a liquid pearl later on just to add a bit of a small pop, just like the first photo.


See the silver finish on the wreath?  I haven't used perfect pearls for a while and this is just great to add some shine to the stamped image.  (I did use a silver pen to fill in the upper left side of the wreath but it didn't work very well.  Glad I stopped there and didn't go on) 


All in all, I'm still not feeling excited about this coming road test.  After hearing a lot of dark sides of the testing system I'm just not feeling hopeful at all.  But life has to move on. We'll see.


Monday, 28 April 2014

CAS-style Happy Birthday card - with Avery Elle Laurels Stamp Set

In the world of the flower-loving scrapbooking and cardmaking, I'm probably the odd one who doesn't like using flowers as embellishments - especially the frilly ones with glitters on them.  The less, the better.  Too many petals, too busy.  All in all not a fan of flowers in my projects.

But a while ago I've been seeing lots of fantastic CAS cards with the prettiest leaves and simple flower shapes and I hesitated.   And I got this stamp set from my great friend Renee - 


This brand is know for its quality stamps, and they have matching dies to offer as well.  Unfortunately I didn't get any dies so I have to hand-cut the shapes.  But nothing is too much of a hassle for card-making, and after 1 hour of inspiration seeking, stamping and cutting, I made this card.


I chose not to stack up the stamp colours as its original purposes, and just add liquid pearls on the flowers.  They look modern and simple.  Also love the vibrant colours it brings out. Highly recommended! 


Thursday, 6 February 2014

Valentine's Day Card made with just ribbons and twines - No punch, no stamp, no tool needed. Super easy!

Remember back in my home I had tons of washi tapes and I made all kinds of cards such as this one?


Cards like this takes little time to finish, and usually with simple lines washi tapes make great CAS cards.  Therefore, when I saw CAS-ual Friday's challenge this time, I knew my one hundred and one washi tapes will make it work. 


And then what do you know?  I forgot to pack any washi tape with me for travel this time.

So I looked around and found some ribbons I got from the local scrapbooking shop right before leaving Singapore.  And so I made this card. :-)


What I did was to position the two ribbons and fixed with double-sided tapes.  Then I hand-cut the hearts and stacked them together with foam tape, tied a twine, (notice that I cut the bottom of the bigger heart so the twine stays in place) and adhered with foam tape on the card.

Style-wise, since this card is for my husband, I want it to look modern and masculine.  I picked a geometric patterned paper and then use one pink and one chevron heart.  I think that pink heart is all he can take LOL.


And a close-up look at it you'll see the laminated crowns on the pink heart.  Cute!  :-D


So you see, no punch, no stamp, no tool. With just scissors it's surprisingly easy.  Happy card-making! (when you travel light :-D )


Monday, 9 December 2013

Pink birthday card for teenager

Since after I got back from Dubai I really haven't gotten much time sitting down put the cards I made online. The reality is, I've had about a dozen of farewell gatherings with friends in Singapore - the play date mums, different groups of friends, school mums, scrapbooking friends, etc.  Nonetheless, I feel thankful to have made so many great friends within such a short time in Singapore, and so my blog's pageviews which has dropped to average 1-2 per day is just miner issue.

Apparently during the holiday season, people still have birthdays (LOL).  So I've made some birthday cards in between the Christmas card making marathon.

Here's the one I made for my niece, who's turning 15 this December.  I use my favorite Swiss dot embossing folder and Spellbinders Nestabilities dies to accomplish the layers, plus Martha Stewart butterflies stamp to stamp the butterfly, Copic colour and trim it.


Wednesday, 27 November 2013

Inspirations! Lovely Doily Christmas Card

As mentioned earlier this month, the end of 2013 and beginning of 2014 is going to be hectic - and it is.  My daughter and I just came back from Dubai last week, and we were both exhausted.  Good thing is we're lucky to be given enough time to recover, and now I'm good to make some more cards again.

Although not very productive I still managed to make a very cute birthday card for a friend's son, and another Christmas card inspired by this one:


http://mercedesweber.blogspot.ca/2013/11/aww-nov-1.html

My version is not as pretty but still not too bad, with a change of colours


For the snowflake shape and the round label I downloaded them from Silhouette Online Store. One is a Print-and-Cut file and the other a plain cut. The rest is all pretty easy.


It is really fun making this card although I know I need more practice to make it as beautiful as the original. And as always you'd think you got it all perfect and clean and bam! a scratch of my gel pen is left on the card.


Wednesday, 6 November 2013

Another distressed Christmas card!

Being a newbie in paper-crafting for a year and a half, 'distressing style' is an area that I haven't dipped as much as I should.  It's all about colours, and how you mix and play with them, creating utterly new visual affects on the card.  Which, to someone who went to a school of colour and design in Sydney,  is something I should really give it a full go and get addicted to.

So today, after a very first attempt trying it with the Christmas theme last night, I decided to make another one.  Same technique as my first distressed Christmas card, I made this.


Instead of the purple frame from the first one, I decided to put the distressed panel in a red one, suggesting more of a Christmasy feel.  Well apparently I still have more practice to do in terms of the mixing of different colours, but I'm quite happy with the result.  Very happy with the doily stamps from KaiserCraft and Prima Marketing, as well as the generic ones found in Taiwan (no name brand)


Tuesday, 5 November 2013

Forest Fantasty Christmas Card - with embossing resist technique

Yesterday while my hard-working husband was too tired to tell me to go to bed early, I managed to finish a card inspired by Jennifer Mcquire's starry night sky card demonstration, with the 'emboss resist' technique.  Because I rarely make distressed styles, this is one of the few that I actually enjoyed and accomplished with great satisfaction.

Well, I do not have all of Jennifer's gadgets, so I simple use what's at hand to make it. And I don't even have a proper snow flake stamp! Eventually I found a teeny tiny snowflakeskish (forgive my crappy English) stamp to make it.  To be honest I'm not sure about the flakes.

So, here it is.  (I also made a bow too but not sure if it's unnessary.)

This card is also up for  CAS-ual Fridays challenge! 


Tools used:  
Stamp - Inky Antics and Inkadinkado
White embossing powder by AC Zing!
Ink pads from Versacolor - Scarlet and Turquoise 


Here're the pictures before the snowflakes


Monday, 4 November 2013

3 CAS Christmas cards in slightly different layouts


Over last weekend I managed to make some more Christmas cards to cope with the fact that I simple do not have time to make them in mid-November.  Reality is, I'll be travelling to Kuala Lumpur, Dubai and Australia in November and December, plus at the beginning of January we'll be moving to Dubai!  And I haven't started any packing yet!  And I'm still not freaking out. That is remarkable.


So here are the three cards I made - as always I do not put too many elements on the card to maintain a simple visual balance, and they are actually simple to make.  I also put two of these cards in the challenges.  These are my first ever challenges!  Oh and it's simply a joy just to view so many other beautiful cards listed there.


Tools used: Cuttlebug and embossing folder, Spellbinder dies, and Martha Steward doily punch


Distressed Style
Tools used: no special tools required except Croc-A-Dile to punch the little holes. I did distress the panel a bit to make it look a bit vintage but not too much.

I also put this card in Sparkle Creations' Christmas Card Challenge! 


I put the card on a photo frame so it shows the washi tape lining on both sides. And as usual you can see the lacking of my photo-shooting skill.


And there's still more card to make...  BTW I just got my first order from my friend, who needs a birthday card for her sister-in-law, and it has to be finished today. And off I go to make more cards - hey ho!


Wednesday, 30 October 2013

Embossed Christmas Card - Red and Beige

Today is my scheduled scrap-booking date with my good friend, Nathalie, and as usual we produced quite a nice batch of Christmas cards.  Although I didn't make as many as she did (please see her works at http://nathouest.canalblog.com/) , I'm quite happy with the result of this one.


This is actually inspired by Papercrafts Magazine Issue Nov/Dec 2013.
http://www.papercraftsconnection.com/blog/2013/10/novdec-2013-go-to-sketch/

Here's the sketch. Quite easy, isn't it?  Well yes except the bow, which I tried tying it up through a punched whole, and I ended up breaking it through!  In the end had to use a glue gun to make the piece. Whew.

But anyway, I did it, and it looks great!

Woohoo!  So now I have only about another 10 different cards to make.  (I only send 1 style to 2-3 people. I don't make 30 of the same cards and send them to all different people.)


Saturday, 26 October 2013

Blue Christmas Card Part 2 - Glittering Star on Christmas Tree. No special tool needed!

I believe that in every card-maker's mind, deep-deep-deep-down somewhere, there's always a little voice trying to tell us to just stop buying for this year's Christmas paper/stamps.  For just once.  So my determination this coming Christmas is stop buying Christmas paper, which I did!  (But there's no stopping buying stamps)

So I flipped through my old Christmas stock (so glad I bought a lot last year)  and found some nice paper to use.  And I did too, with a little help from this year's stamps woohoo!


And I really love it!  The last thing I want my Christmas card to look like is those commercially made ones that screams "Boring!"  To me personal style is very important, whether if it's traditional, cute, nostalgic, retro, Victorian, distressed, flashy or cheeky.  So whilst it's not perfect, it is definitely of someone's style and unique.  (That is also why I don't like to send all my relatives and friends SAME Christmas cards)


But making your own style doesn't mean you can't get inspirations from Two Peas or Pinterest. For example I looked on Pinterest for layout inspirations and made this card. Besides every time I look at other great works and think "I'm gonna make that too!" and it always end up differently, which is part of the fun too.  

I use last year's BoBunny cardstock, putting glittering powder on the star on the Christmas tree and adhere the piece on the right side of the card, which was stamped with scripts in white ink.  Then I emboss Christmas Greeting on scrap paper, cut around it and stick it on the corner with foam tape.


Then I stamp the snow flake on another scrap paper, cut around it, get a whole, and tie the twine through it and tie a knot. Finish!